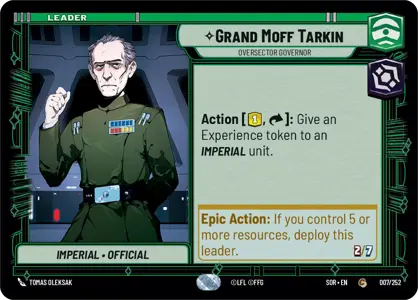
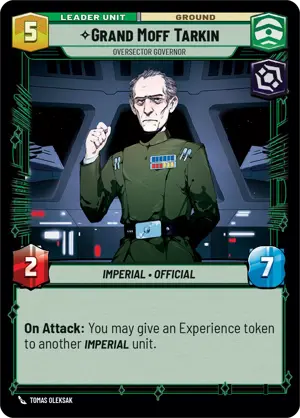
Big Moff Pi | R/G/B Mid Aggro


Total: 50 Cards
Ground Units (33)
Space Units (10)
Events (7)
Math
Cards by Cost
Cards by Aspect
Cards by Type
Cards by Rarity
Draw Cards
Published November 02, 2023
Just like the guitar pedal referenced in the name, this deck is fat, beefy, and aggressive with plenty of sustain. Blurring the lines between aggro and midrange, the goal of this deck is to utilize Experience and Imperial buffs to snowball into insurmountable mid game board states. It shares a lot of DNA with other "Tarkin Aggro" decks while tightening the cost curve and focusing more on resilient units. The result is a Mid/Aggro deck that can race or outlast.
Notable Card Choices:
Superlaser Technician: Probably the first thing you'll notice right off the bat is the absence of SLT. From what I gather the community is pretty hype on this card, and I think they have good reason to be. However, a good tool for the wrong job is a bad tool -- and it's my opinion that a 3 cost 2/1 ramp card is too slow and doesn't fit the needs of an aggressive midrange deck. The cost curve in this deck tops out at 6, and you'll rarely find yourself needing or wanting a resource pool past 7 or so. Sacrificing early game aggression and resiliency in a unit is not worth it. Every single unit needs to count. So SLT gets the axe.
Colonel Yularen: Yularen is a decent early game drop on his own, 2/3 body for 2 is respectable. Indeed Seasoned Shoretrooper is considered a reasonable body even before it gains it's +2 bonus. However, the real reason Yularen is here is for sustain. In matchups against other aggressive decks, the incidental healing from Yularen here can be quite potent -- and with 20 units in the deck triggering his ability (including himself), there's plenty of opportunity to sustain your way through a more aggressive deck's early pressure and win off the back of your superior mid/late game.
Seasoned Shoretrooper: As mentioned above, a 2/3 body for 2 is respectable, and there's both Imperial and Trooper synergy here. The real cherry though is the +2 boost you get in the mid/late game once you hit 6 resources. Early drops that turn into strong mid game threats are exactly the kind of unit that a mid/aggro deck is looking for.
Emperor's Royal Guard: 3/4 for 3 is a pretty solid body, decently resilient and can trade up with a lot of 2 drops. However, the real reason that it's here is because this deck eschews Space presence for an overwhelming Ground force -- and those Ground units need protecting. We're running 12 Officials in this deck, so it's not terribly difficult for Sentinel to be online, especially in the mid game.
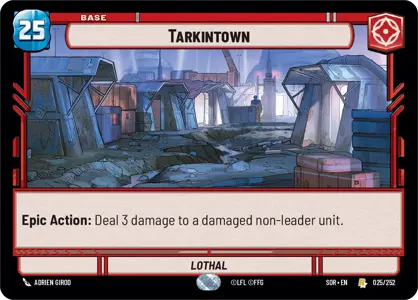
Consortium StarViper: Same cost as Star Wing Scout with slightly less attack, but it more than makes up for that with a much more resilient 3 health -- and just like Yularen, StarViper gives this deck a lot more sustain against other aggro decks. This is especially important considering we're running Tarkintown and begin the game with a health deficit in some matchups. Although it trades decently well with other early game space units the unfortunate downside of StarViper is that its not really targetable by any of our Experience boosts. Still, StarViper will eat Space threats for you since your opponent can't afford to let you keep healing off it, and since its job is to help win you races, that's exactly what we need.
Disabling Fang Fighter: Compared to TIE Interceptor, this unit is cheaper and against Hero decks has about the same floor (removing a Shield). There's opportunity for a strong ceiling though -- the clutch advantage here being that Fang can remove Upgrades in the Ground theatre, which is where we really want to be focusing on the most anyway. Getting rid of a Lightsaber or Shield on the Ground can help us play to our strengths.
I Am Your Father: 9/10 times this is not going to be removal -- it's going to be refueling for the mid/late game. And that's okay. As long as we stay topped off on life, we don't necessarily need powerful removal to deal with mid/late game threats -- we just need more bodies and more Experience. Still, we're only running 2x copies of this since it can be a bit of a tempo hit.
Tactical Advantage: Probably the most controversial include here, Tac Advantage is here to enable up trading, bigger damage swings, protecting critical units from damage based removal long enough for them to get value and, as an added bonus, beefier Overwhelming Barrages as it effectively turns nearly any Experienced unit into a very dangerous OB target. This definitely gets resourced a lot, but I think it serves the core strategy of the deck too well to not include and it's much cheaper than other removal we could slot in its place.
There are probably other notable exclusions I could talk about, but really they all boil down to being too expensive (Palp / Gladiator) or too much of a tempo hit (Maximum Firepower).
Mulligan and Strategy:
Obviously being an aggro deck, cheap units to drop early and get pot shots in are solid in the opening hand, but more often than not what I'm happy to do is find a decent 2 drop (Yularen, First Legion Snowtrooper, Seasoned Shoretrooper) and take Initiative and try to keep it as often as I can throughout the game. Since so much of our strategy is bound up in maximizing trades with beefed up units, the last thing we want is someone else to have the ability to deny us our value before we can capitalize on it. Too much of our value is tied up in threats on the battlefield. So try to hold onto initiative as much as you can.
If you sense early on that you're going to be falling behind on life, pivot to defense. Get healing in with Yularen and StarViper, drop Sentinels and slow the bleeding. Generally speaking, your strategy is to make value trades and leave behind big threats. Utilize Experience and other buffs to deny trades. There will be windows of opportunity where you can get a big swing in with a buffed unit -- the key decision points in the game are going to be whether its worth it to take the damage or to cash out on your unit to kill one of your opponent's threats that are otherwise difficult to deal with.
Remember, you don't really have much removal in this deck. Overwhelming Barrage comes in very late in the game for you and isn't always a guarantee. Units are your removal -- so don't be afraid to make trades. If you start falling behind in card advantage, that's what Tarkin and IAYF are for. Make trades, refuel and rebuild.
As far as matchups go -- I don't really know what the "meta" looks like right now and I suspect it will continue to change tremendously in the coming months as more cards are spoiled. I suspect this deck will struggle against control decks since it might not be quite fast enough to end the game before they can stabilize.
That said, considering what the card pool looks like right now I think that RGB Imperial Midrange is one of the more well defined archetypes we have at the moment and I don't foresee too much of this deck changing with further reveals. It's a really solid package at the moment.
Good luck. You may fire when ready.
Comments
Formatting
Deck descriptions support a subset of markdown. If there's markdown formatting you'd like added, please let me know.
- **bold** - Double asterisks to make bold.
- *italic* or _italic_ - Underscores or single asterisks to make italic.
- # Heading through #### Heading - Hash/pound to make
A Heading
- [Words go here](https://example.com) - Links. Link to things.
-  - Include an image in your description. The image title is optional. Include alt text, please: let's make the internet better for everyone.
- If you want to link to cards, the format is #[SET_CARDNUMBER]. So #[SOR_200] will render Spark of Rebellion.


